
I sewed my two "Not So Ugly" sampler blocks today, and I like how they turned out. I wasn't sure if I was going to like the green with the "ugly", but it's okay!
I started sewing those mitered borders on the basket block, but I got distracted...so what's new?
Anyway, after answering someone's question on Stashbusters about how to make a "magic-Nine-Patch" I decided to put a little tutorial here.
Step 1: Decide on a finished block size easily divisible by 3, and cut squares of your fabrics 1.5" bigger than that. For my demo I am making 6" finished size blocks, so my squares are 7.5"

Step 2: Place fabrics face together and sew down 2 opposite sides.

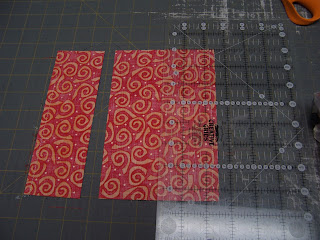
Step 3: Cut squares into thirds (2.5" from each side), parallel to seam you just sewed


Here's what you have:

Step 4: Sew as they have been paired up, light to dark, dark to light. Press seams to the dark.
Now you have this:

Step 5: place fabrics face together, lining up seams. Take a 1/4" seam down both short sides (crossing previously sewn seams.

Step 6: Cut parallel to the seams just sewn, 2.5" from each edge (1/3 of original square size)

Now you have this:

Step 7: Sew larger unit to smaller matching light to dark and vice-versa.

Press seams to the side with 2 dark patches.

You now have two 9-patch blocks of opposite coloration.

2 comments:
very interesting! Quite often you will need an assortment of 9 patches, and this will make it so much easier. Thanks!
Makes a quick rail fence too! I love that ugly fabric, I keep seeing venus fly traps in it.
Post a Comment